

IMAGE WEB OPTIMIZATION
I want to share with you a pretty cool trick. I think this may be the most elusive technique in web development and web design in general. If I was asked to teach just one thing pertaining to web development, this would be the skill I would want each website owner to learn. Most website owners and developers probably have no idea about it.
But before we get to the trick, let us look at the various image file formats:
JPEG (Joint Photographic Experts Group)
This file format was developed by the Joint Photographic Experts Group. It works well for natural image types. Generally, JPEG is used when small image size is more important than image quality (such as web pages). JPEG is the most popular image format on the web.
GIF (Graphics Interchange Format)
GIF was developed by CompuServe in the computer 8-bit video era. This image format is ideal for logos, line arts and other simple images that have no gradients or varying color. GIF is good for web graphics that have limited color and transparent backgrounds.
PNG (Portable Network Graphics)
This file format was created fundamentally to replace and improve the GIF format. It is an image format specifically created for the web. PNG creates better quality images for the same kinds of limited-color images.
WebP is a new image format for the web developed by Google. It provides quality lossless and lossy compression for images on the web. These images are smaller, richer and make the web faster.
Now that you have an idea of the various image formats, let us get back to our trick.
So what is the trick?
The trick is based on understanding how nearly every website owner saves images on the web. How most website owners save images is WRONG!. So, how do I come to this conclusion?
This conclusion is based on the fact that when you visit the average website, your computer has to download various files from the website server. These files include; style-sheets, HTML, scripts, fonts, video, images and other files. The pie chart below represents the major file types (Image is courtesy of smashing magazine).
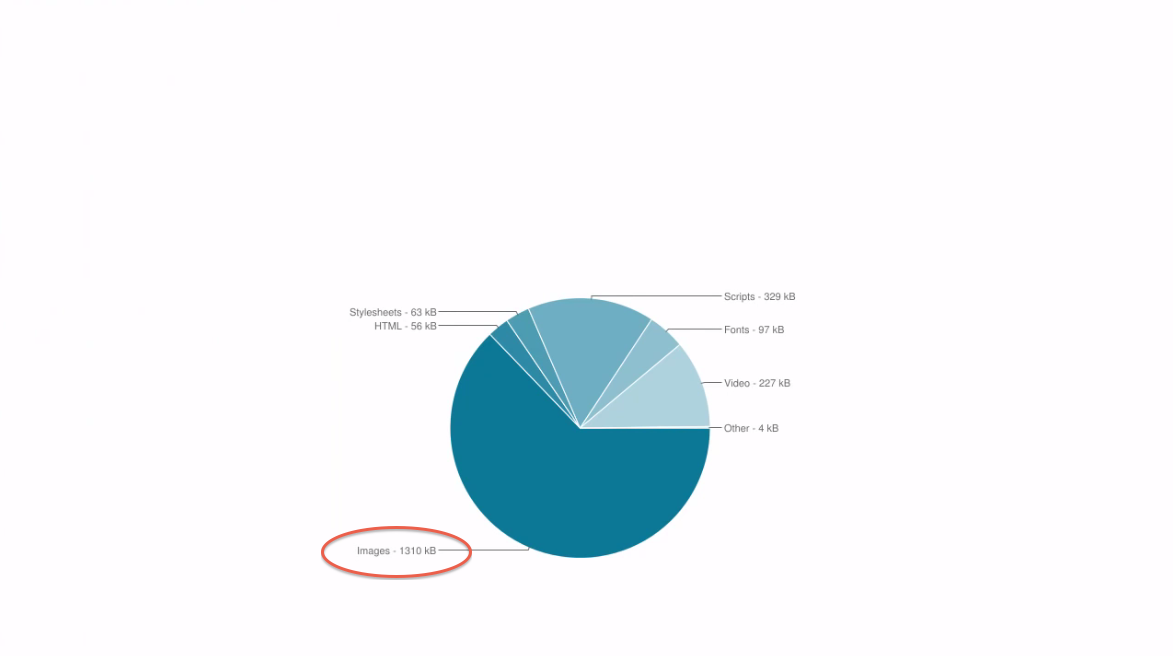
From the pie chart we can see that much of it is just text and computer code, but the biggest chunk of the download task is occupied by downloading of image files (almost two thirds of website files are image files). This is the area highlighted in red in the second pie chart below.
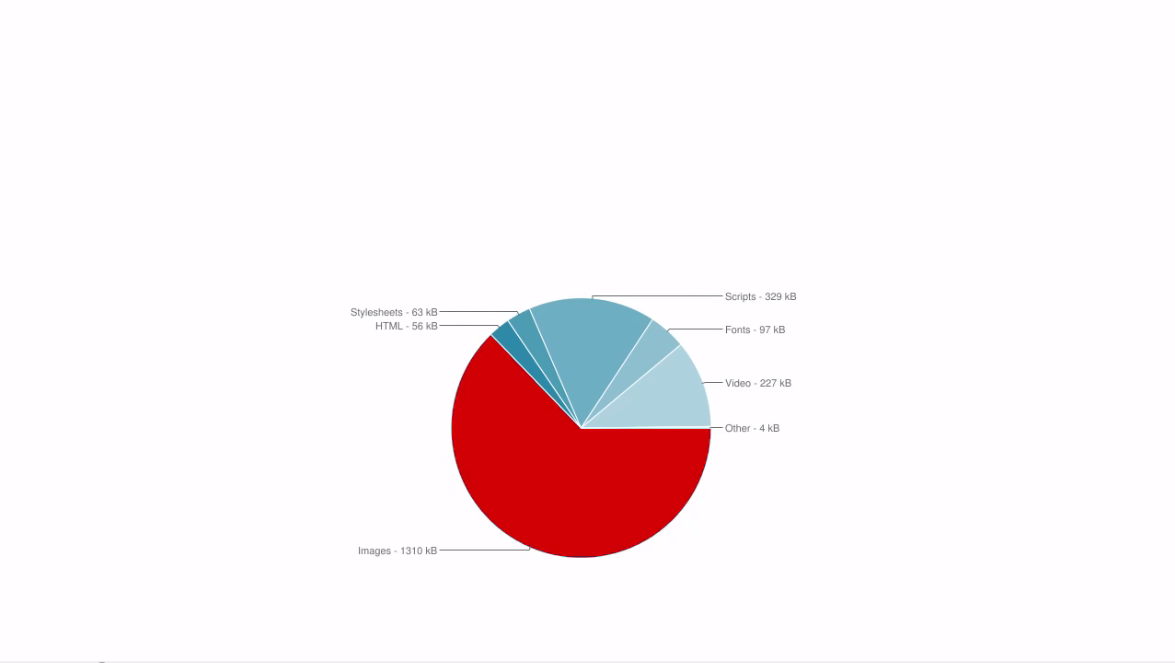
What this means is that whenever your readers or customers are waiting for your web page to finish loading, there’s a good chance they are waiting for your image files to finish downloading from your server to their computer.
What this means, is that big image files are a big problem. This becomes a huge problem because for every second your users have to wait, you are losing potential customers.
So, if you run a website, it’s in your best interest to learn the art and science of Image Web Optimization. Knowledge of image web optimization can cut your users wait time. Image web optimization focuses on reducing the size of the image, without compromising on the quality of the image.
If you learn how to do image web optimization correctly, you can reduce the image file size without any noticeable quality loss at all. It will be very difficult for the casual web visitor to perceive any difference in image quality. Web optimized images can be reduced to almost a fifth of the original image file.
Below is an image of a before and after effect of image web optimization on an image file.
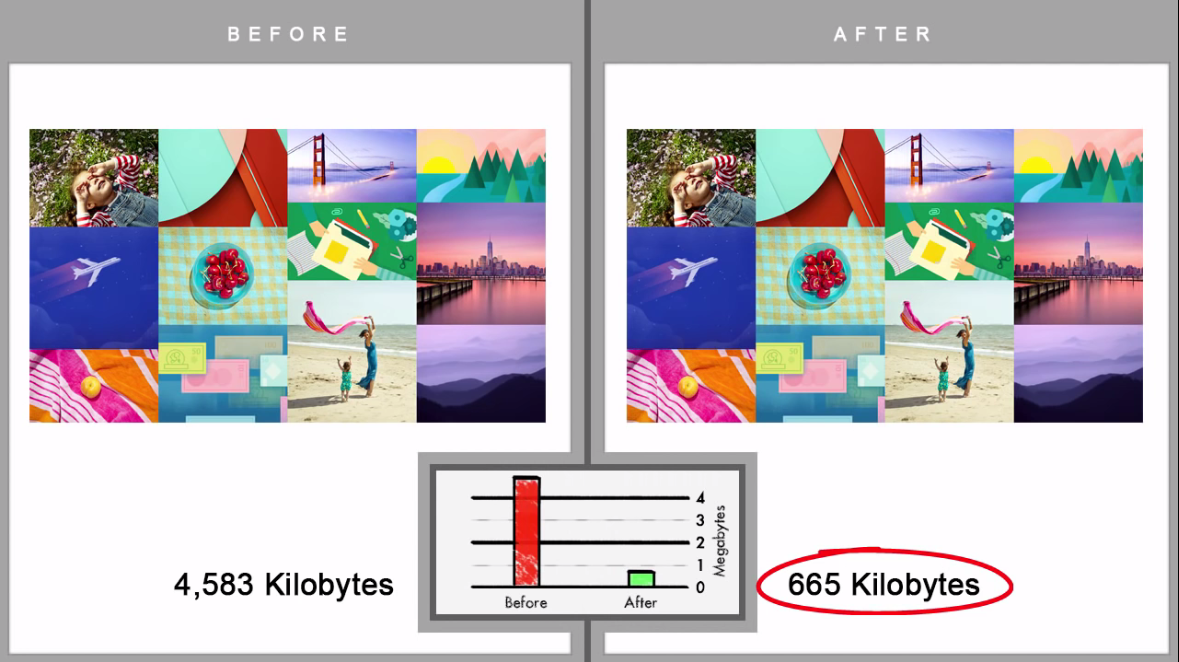
As you can see from the image above the two images look identical but the image file sizes are not the same. The web optimized image which is 665 Kilobytes (after), is almost a fifth of the original image 4,583 Kilobytes (before). Also notice how the web optimized image has not lost its quality.
Here is another example.
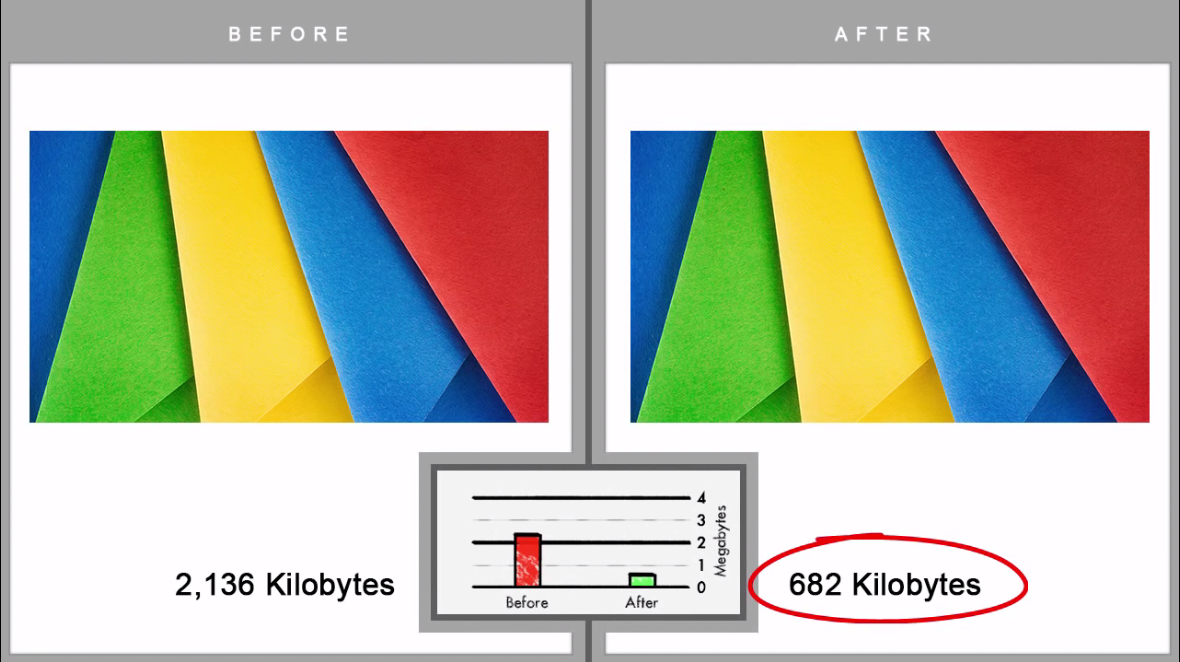
The original image is 2,136 Kilobytes and the web optimized image is 623 Kilobytes. The original image has been cut down to almost a third.
I know by now you are wondering… What is the trick? How do I do it?
HOW TO DO IMAGE WEB OPTIMIZATION
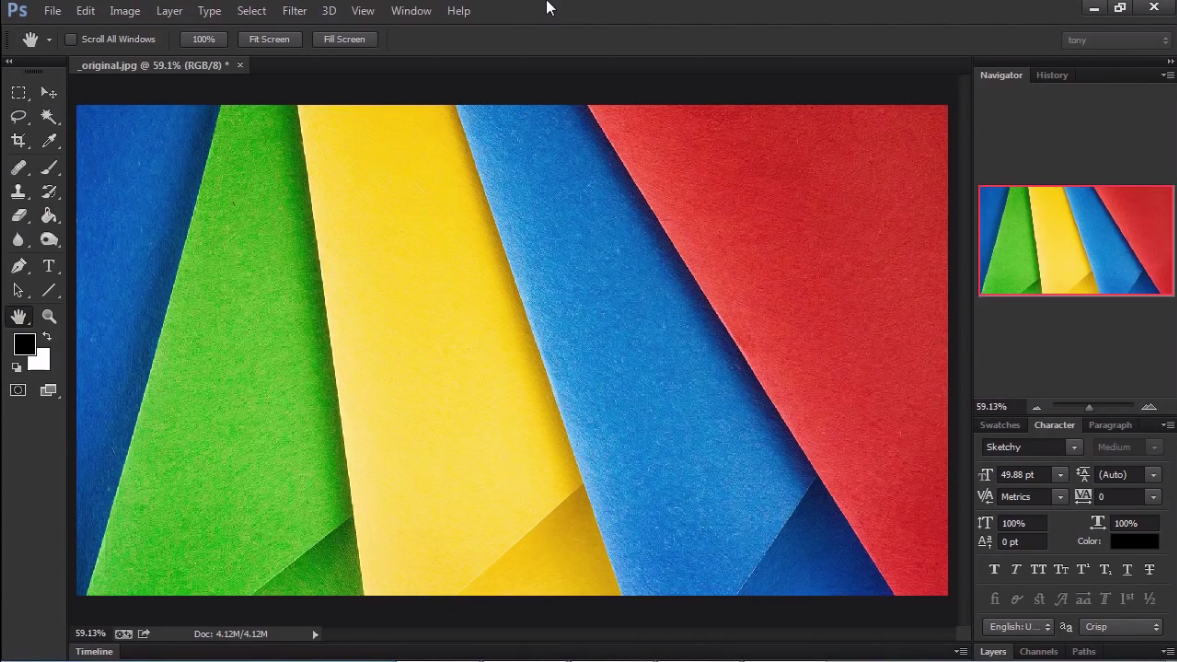
We will use the above Google+ default image in our example. Remember that the original Google+ image is 2,136 Kilobytes.
To optimize this image, we are going to use Adobe Photoshop Elements as our image editing software since it is the industry’s standard.
Step 1: Open the adobe Photoshop software on your computer and then open the image you want to web optimize (In our case the 2,136 Kilobyte Google+ JPEG image file).
Side note :
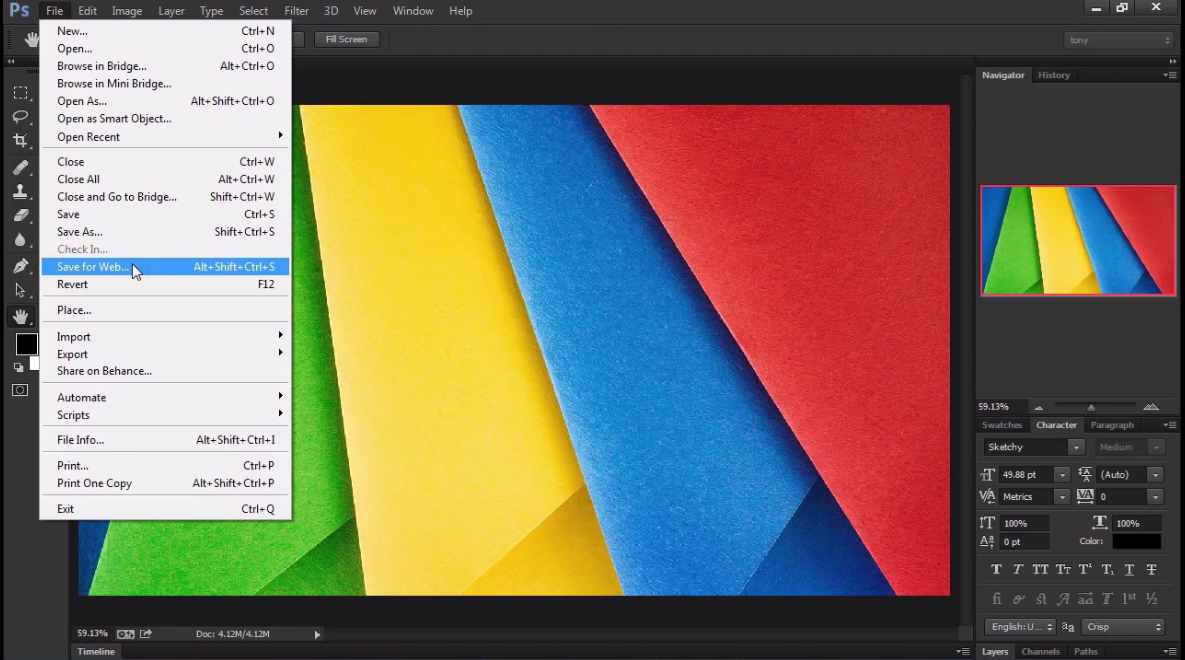
Step 2: Click on the file menu then scroll down to “Save for Web…” or the short cut keys combination; (Alt+Shift+Ctrl+S )
This opens up the Photoshop Save for Web interface below.
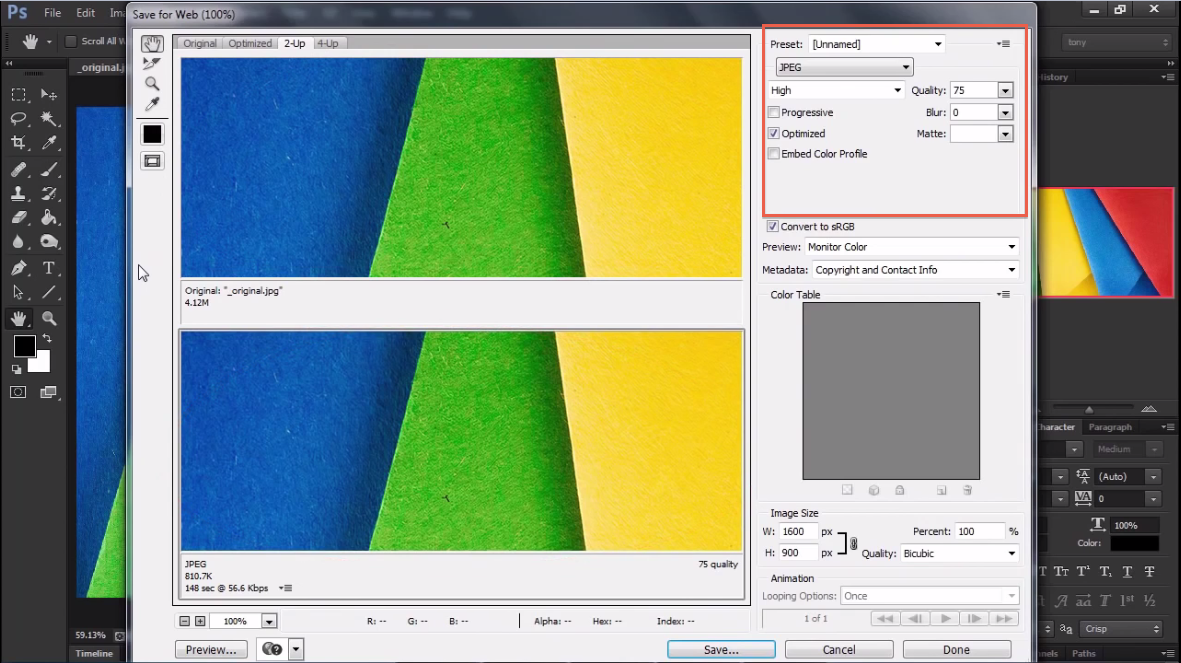
From this interface, we can see our original image at the top and the web optimized image we are about to create at the bottom.
On the top right corner of our interface, you will notice that we have our image format set to JPEG, which is appropriate for this image. On the image format drop down menu, you can select a different image format. Proper Image format selection is a huge topic in itself.
Step 3: Just below the image format selector, move the image quality slider.
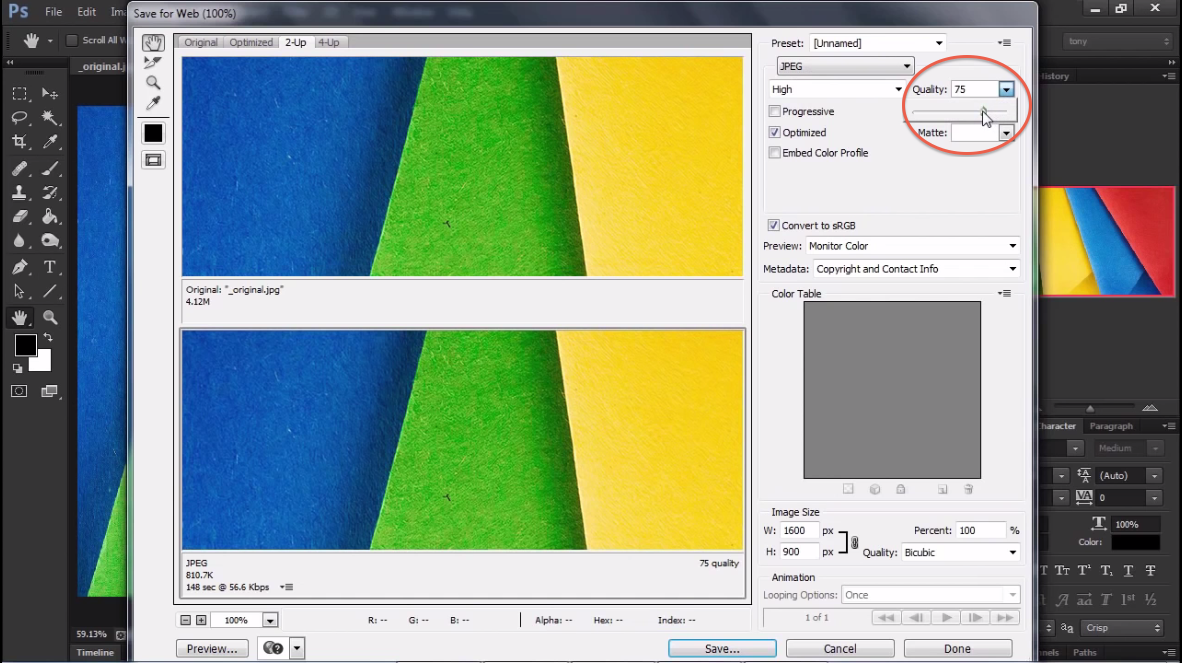
By moving the slider all the way to zero quality, the size of the image will become small but the image will not look good. It will look a bit blurry, which is not what we want.
By moving the quality slider all the way to 100 the image will look good, but the image file will be very large. This is also not what we want.
In image web optimization, our goal is to keep the image size small without making our image quality “suffer”. We have to keep moving the image quality down until we reach to a point where we are comfortable with both the size and the quality of our image.
Step 4: Move the image quality slider to a point where image size is reduced without affecting image quality.
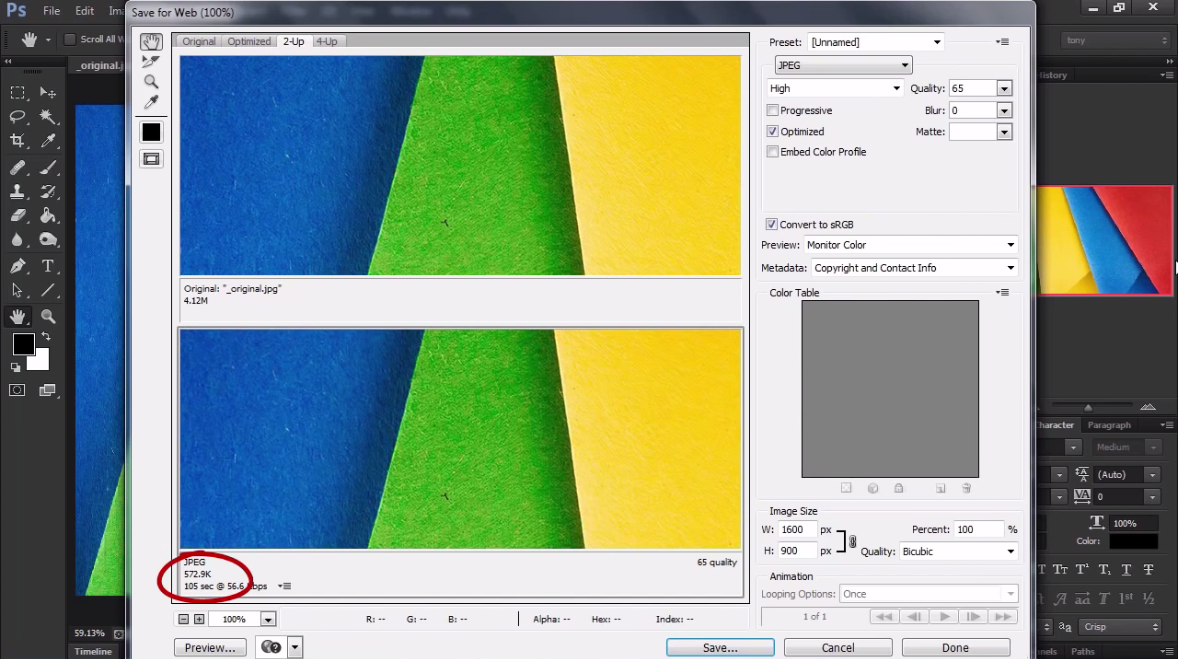
In our example above, the quality of our image begins to “suffer” at below 50%. So for example, I can set the image quality at around 65%. At 65%, the image size is small and the quality of the image is not affected.
The bottom left corner tells us what the image size will be when we save it. In our example, the final image size is 572.9 Kilobytes. This is about a quarter the size of the original image.
Step 5: Save the image.
At the bottom of the Photoshop Save for Web interface, you will find a save button. Click on this button to save your web optimized image.
From this tutorial, we can appreciate the value of image web optimization. If we assume every image on the web page had similar poor optimization, then we can cut the file load of that web page in half using this technique.
I hope from this article you have learnt more on web optimization. I encourage you to apply this technique to your own website, it will make a BIG difference for your website users.
Improving web performance and giving a better experience to our users is our job as developers and designers.

